
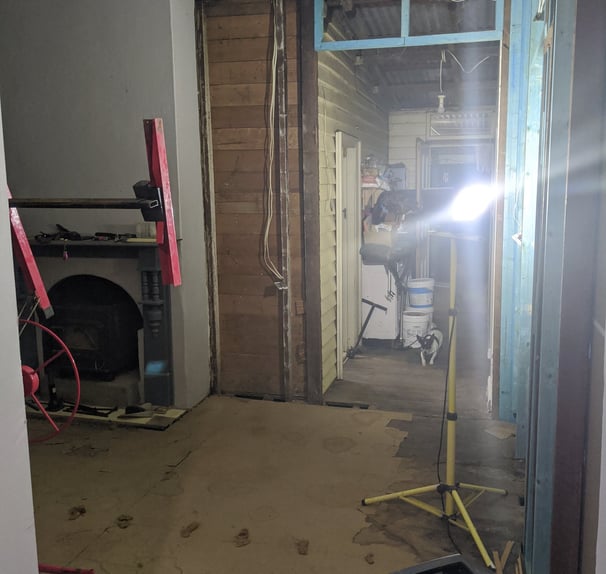
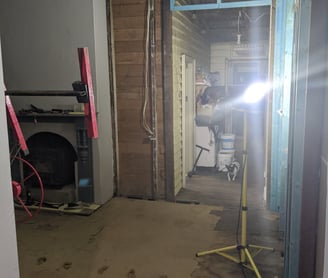
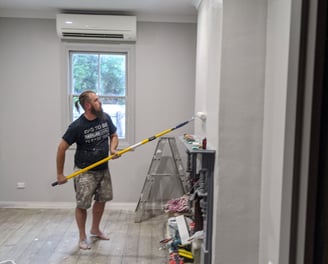
Stripping Down the Lounge Room
The renovation of our lounge room started with a complete strip down to the bare floor, wall frames, and rafters. This process created a blank canvas for redesigning the space to better suit our needs and aesthetic preferences. Every old material was removed with precision to maintain the integrity of the room’s structure.
Lounge Room
Removing Existing Elements
The first task was to carefully remove the existing lining boards, skirting boards, and architraves. This required a meticulous approach to avoid damaging the underlying framework. By stripping these elements, we prepared the lounge room for a fresh start and ensured any hidden issues could be addressed.
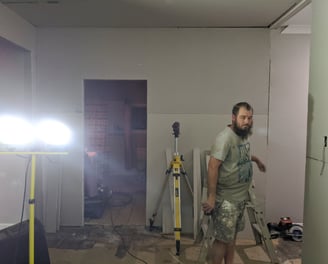
Upgrading Electrical Wiring
The electrical wiring was updated to accommodate new lighting and power needs. We installed four LED downlights in the main area, a three-LED light rail to highlight key sections. Extra power sockets were strategically placed to ensure the room could handle modern electrical demands, enhancing both functionality and convenience.
Reinforcing the Structure
Once the old materials were cleared out, we reinforced the wall corners and other critical areas with additional timber. This structural support was crucial for the longevity and stability of the new design. Properly braced walls provided a solid foundation for the upcoming renovations.
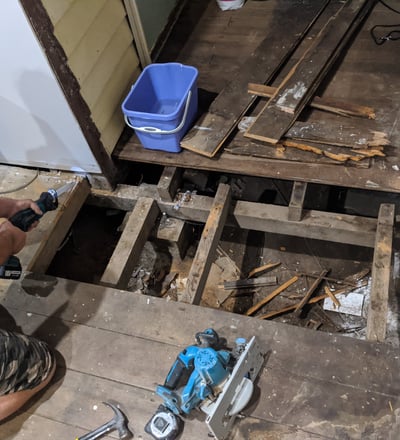
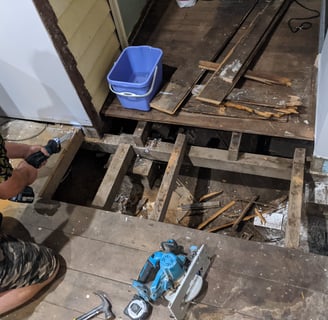

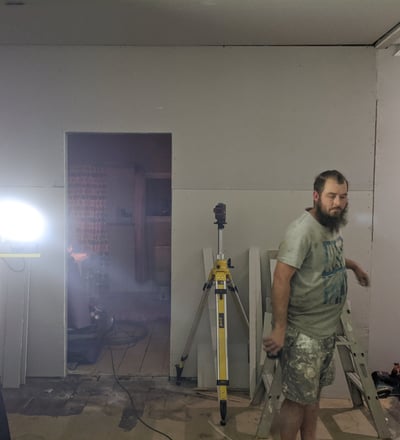
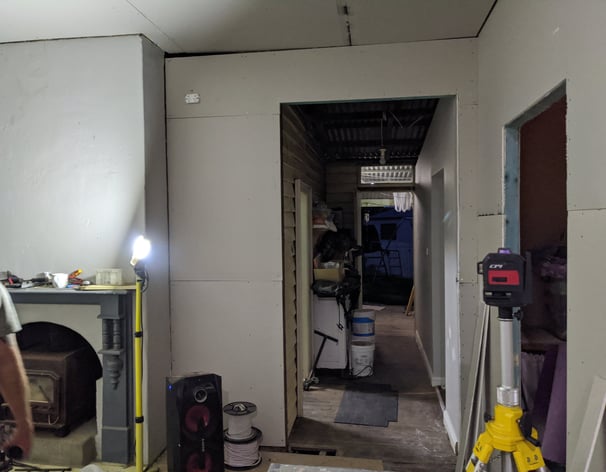
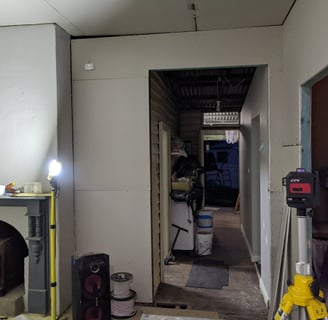
Installing Drywall and Trim
The floor needed extensive jacking up to achieve a level surface. This involved careful adjustments and reinforcements to correct the uneven foundation. The effort paid off, resulting in a perfectly level floor that provided a stable base for the new flooring and furniture.
Leveling the Floor
New drywall was carefully measured, cut, and installed to fit the room’s framework. We then added Federation-style cornices, skirting boards, and architraves to bring a touch of classic elegance to the lounge. Each piece was meticulously fitted, ensuring a seamless and refined appearance that blended beautifully with the overall design.
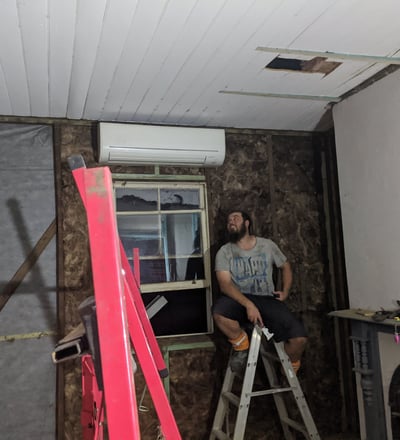
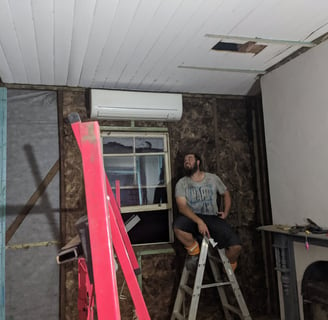
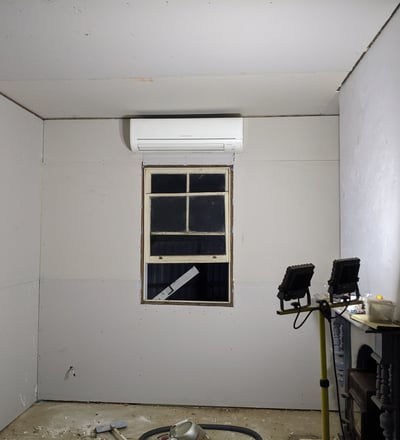
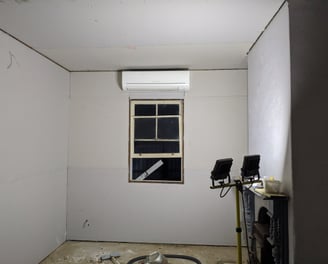
Framing and Drywall Around the Split System Air Conditioner
Framing and drywalling around the split system air conditioner proved more complicated than anticipated. Precise measurements and careful cuts were necessary to ensure a perfect fit and optimal functionality of the unit. This part of the project required extra attention to detail to maintain the room’s aesthetic and ensure efficient operation of the air conditioner.
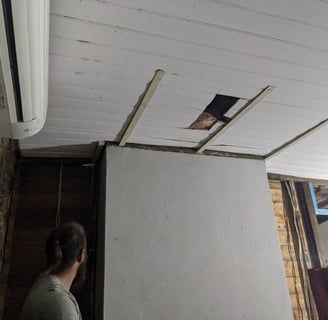
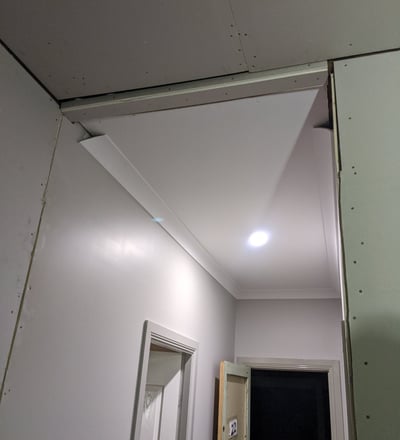
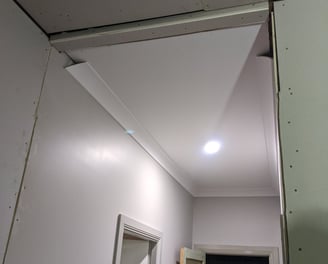
Suspended Ceiling Installation
We left the original lining boards on the ceiling and suspended a false ceiling frame to address the extreme unevenness of the old sagging ceiling structure. This approach allowed us to create a level ceiling without the need for extensive structural modifications. The new ceiling frame provided a clean, modern look and enhanced the overall aesthetic of the room.
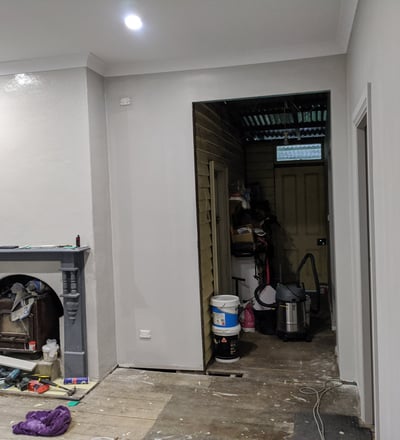
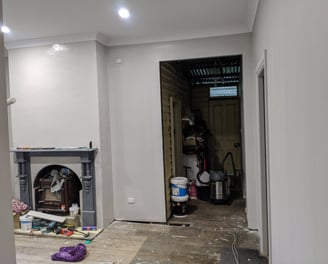
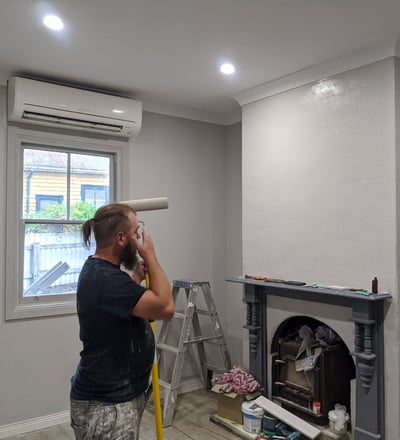
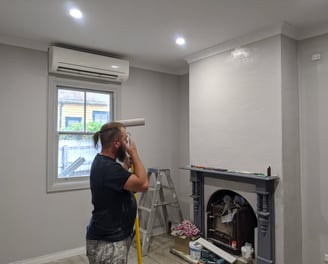
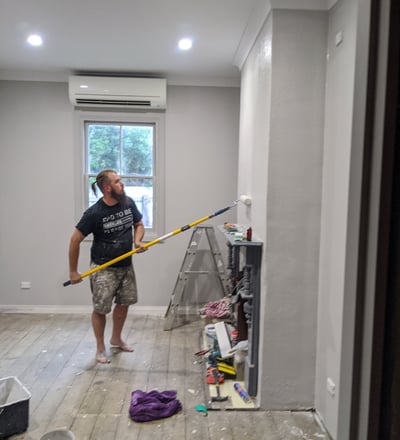
Painting the Lounge Room
Painting the lounge was a crucial step in transforming its look. We chose a light grey for the walls, which provided a neutral yet warm backdrop. The architraves were painted a darker grey to create a subtle contrast, while the skirting boards and doors received a gloss white finish for a touch of sophistication. The ceiling and cornice were painted white, enhancing the room's brightness and giving it a cohesive, polished look.
Final Installation and Testing
With the painting complete, the final touches were added. The LED downlights, and light rail were installed and tested to ensure everything worked perfectly. The new power sockets were fitted, providing ample outlets for electronics and appliances. After another week of navigating a semi-finished construction site, the lounge room was finally ready. The completed space now combines modern functionality with classic style, creating a comfortable and inviting environment for relaxation and entertainment.
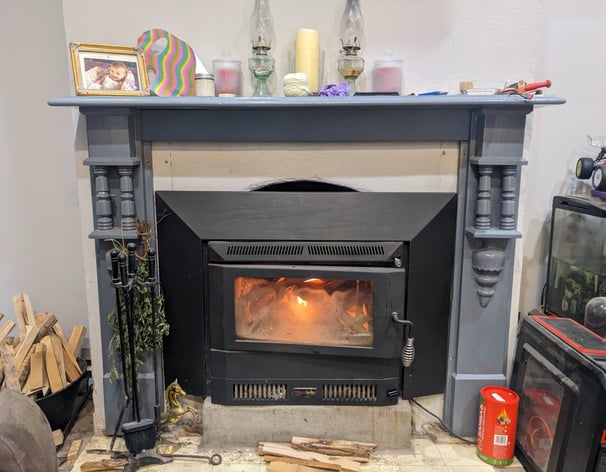
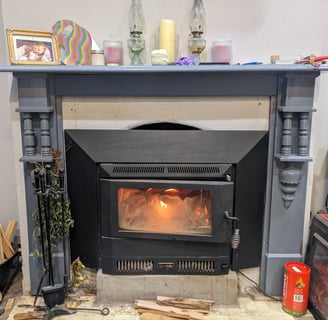
Reviving the Federation Charm: Restoring the Mantlepiece
Widening and restoring the old Federation-style mantlepiece around our new fireplace was a rewarding project that breathed new life into a cherished feature of our home. We began by carefully stripping back layers of old paint and varnish to reveal the original wood beneath. Holes and imperfections were meticulously filled to prepare the surface for restoration. To accommodate the new fireplace, we widened the mantlepiece by adding a new backing panel, skilfully integrating it into the existing structure. Fortunately, the original top was wide enough to complement the modification, preserving the mantlepiece’s classic charm while seamlessly fitting the updated space. The mantle is a feature so we opted to paint it in a darker shade of grey gloss enamel as to have it stand out, but still blend in seamlessly with the houses overall colour scheme.
Installing the Scandia Warmbrite 200E: A Classic Touch to Our Home
Installing the new Scandia Warmbrite 200E fan-assisted internal combustion wood fireplace and flue system was a significant upgrade to our living space. This well-built and highly sought-after model, known for its efficiency and classic design, fit perfectly with our home's aesthetic. The installation process included fitting the flue system and ensuring proper ventilation, along with a modification of the hearth's brickwork to accommodate the lager footprint of the new fire place. We also opted for the large shroud, which seamlessly complemented our earlier mantlepiece customization, enhancing the fireplace's overall appearance. The combination of the Scandia Warmbrite 200E and the restored Federation-style mantlepiece created a stunning focal point in our home, blending modern functionality with timeless elegance.


Expert Renovation Solutions for the Hunter Valley
Located in the scenic Gresford, NSW 2311, we proudly offer top-tier renovation services to the entire Hunter Valley region. Our expertise spans a comprehensive range of renovation needs, from structural framing to fine finishing touches. Whether you're in a lively city or a tranquil rural area, we bring the same level of dedication and craftsmanship to every project. Our goal is to elevate your living space with precision and style, ensuring it meets both your aesthetic preferences and functional requirements. Reach out today to explore how our renovation solutions can transform your home in the Hunter Valley.
Check Out Some Of The Services I Have To Offer
Or Reach Out And Get In Touch With Me
Explore other areas of the work done on Our Little House
Check out my Services Offered
Transformation
Restoring our cottage into a modern retro home.
Talk to Us
Our Little house
shannon@ourlittlehouse.com.au
0497 026 081
© 2024. All rights reserved.